Showing posts with label Stamp Materials. Show all posts

Saturday, May 12, 2012

How to Cut a Craft Foam Stamp

1. Join two sheets of self adhesive craft, leaving the paper back on one sheet.

2. Print your image right reading. Cut away excess paper. Glue stick the back of the image. Adhere face up to the paper side of the foam.

3. Using a sharp blade, cut out the image. Check the angle of your blade - keep it straight or angled slightly outward. When you're ready to mount the foam to Plexi, peel off the paper image, center and level the stamp on a mat. Center the Plexi over the letter and adhere. I used a regular kitchen rolling pin to apply equal pressure.

4. Do this 25 more times. Or, be like me and choose a wicked complex image, don't follow instructions and do it your way. Seriously.


How Not to Cut a Craft Foam Stamp

I just spent the last hour transferring and cutting out this letter. It did not go well. N is for Nope. Nay. Not.
This tangle of yellow foam is all I have left to show for my first cut and mounted letter. Any other person would have chosen a simple letter, but no - I have to pick one with skinny legs and 15 cutouts.

I printed my letter in reverse, cut away the excess paper and taped the image to the foam side of a single thickness of craft foam. Cutting out the actual letter with a relatively new Exacto blade was pretty easy. Cutting out 15 little sections took forever and the results were clearly the work of a novice.

The next step was to mount this floppy, sticky contraption onto Plexiglas. Fail. The industrial strength adhesive on the back of this batch of foam made handing, placing & repositioning out of the question. Any attempt caused stretching and tearing. I gave up, pulled as much foam as I could off of the Plexi, rolled it up in a ball and considered plan B.

This time, I printed the letter right facing and taped it to the paper side of two layers of craft foam. Made the large straight cuts. Wow. This is a nice, firm stamp. The skinny legs don't even flop. This thing will last forever and should be way easier to mount. Kind of like the pros have demonstrated during my research?

The next challenge was to cut these shapes and not ruin this gorgeous new stamp. I tried heat carving some scrap using two different tips. Both left a ragged edge and created a dubious trail of melt-smoke. I did figure out removing only one layer of foam would result in a recess deep enough to keep from filling with ink when rolled.

This time, I used a glue stick to adhere the reversed image to the foam side of the stamp. I cut through one layer (often grabbing two) then peeled off the cuts. Really, if I hadn't been too lazy to look for a new blade, this might have gone better. It took forever and while the results were passable, they were far from professional.

In our process, every imperfection in a stamp becomes part of the image. I may find that thick and opaque textile inks make this not matter, but I'd rather just learn how to cut a clean stamp.

Plan C:  A simple font. Right facing image attached to the paper backing with a glue stick. Two layers of craft foam. One sharp Exacto blade. TTYL.


Tuesday, May 8, 2012

Craft Foam Wins

In an earlier post, I said the fine lines in this Galbraith & Paul block design must have been made with something other than craft foam. This closeup, unpainted view shows I was wrong. It's also two layers of craft foam, making me doubly wrong. 

So I started wondering why two layers? Even though one layer results in a deeper stamp than any we use at Museware Pottery, there's probably a good reason to use two. First, the fluffy nap of this roller will hold much more paint than the dense foam of our rollers. And more paint means more of an opportunity for excess transfer. If you're printing a single yard, the loss is manageable. But if you're printing a 10 yard order, one 1/2" smudge would ruin the entire run.

So, I'm back to the cutting mat, learning to perfect a clean, straight sided cut through two layers of craft foam, which is really just another technique to master. That will be the easy part.

The hard part? Pattern repeat. After 5 days in bed with the flu, I spent the first half of my work day sorting through 100s of emails. The rest was spent trying to understand fabric repeat. I have a lot of learning to do. Photoshop makes creating pattern repeats relatively easy. Translating that understanding into a workable block print - that's another thing entirely. This blog could well go on forever.

Thursday, May 3, 2012

Heat Carving

Since the designs keeping me awake at night are large in scale and require more knowledge about block printing than I currently have, I decided to put design & block construction aside to play with a little detail. Using this Creative Textile Tool.

Last night while watching Toddlers & Tiaras (I know. Shoot me) I pulled this gadget out and plugged it in. While waiting for it to warm up, I learned a little about what it can do. Sort of a cross between a soldering iron and a wood burning tool, this tool can be used to emboss velvet, transfer laser-print images onto fabric, fabric applique, seam pressing, stencil cutting and more.

Since my drawing skills are limited to simple geometric shapes and badly proportioned interpretations, I thought I'd stick to the basics - circles and lines. The first thing I did was grab a large foam dot and melt some little dots into it. Stamped the results on scrap. Smiled. Little effort for a fun effect.

Lines heat carved into craft foam are not smooth and clean like those made with a blade. Pulling the heat tool through the foam leaves a tattered, kind of jaggy edge that's kind of interesting.

My next remarkable work of art was a square filled with radiating circles and lines. Don't be jealous of my
skillz. As lame as it looks, the stamped results were fun and inspirational. The cuts were deep enough not to fill with paint when rolled. I flipped it over. The cuts went down to the adhesive, but not through it. Which means the element won't fall apart when mounted onto Plexi.

I've gained a new respect for craft foam in the last days. I have no idea how or what it's made of and hope that when I find out, the knowledge won't accompany a wave of guilt. This cool material can be heated with something as simple as a 75 watt bulb or heat embossing tool, then pressed into just about any textured surface you can think of. Once it cools, the texture remains until heated again. Buttons. Coins. Rubber bands. Corrugated cardboard. This journey just keeps getting cooler every day.

Wednesday, May 2, 2012

First Block Print


I managed to test the new block last night and man was it fun. Women Nicole & Sara had just finished glazing so they watched, handed me supplies (like a surgeon) and photographed the process.

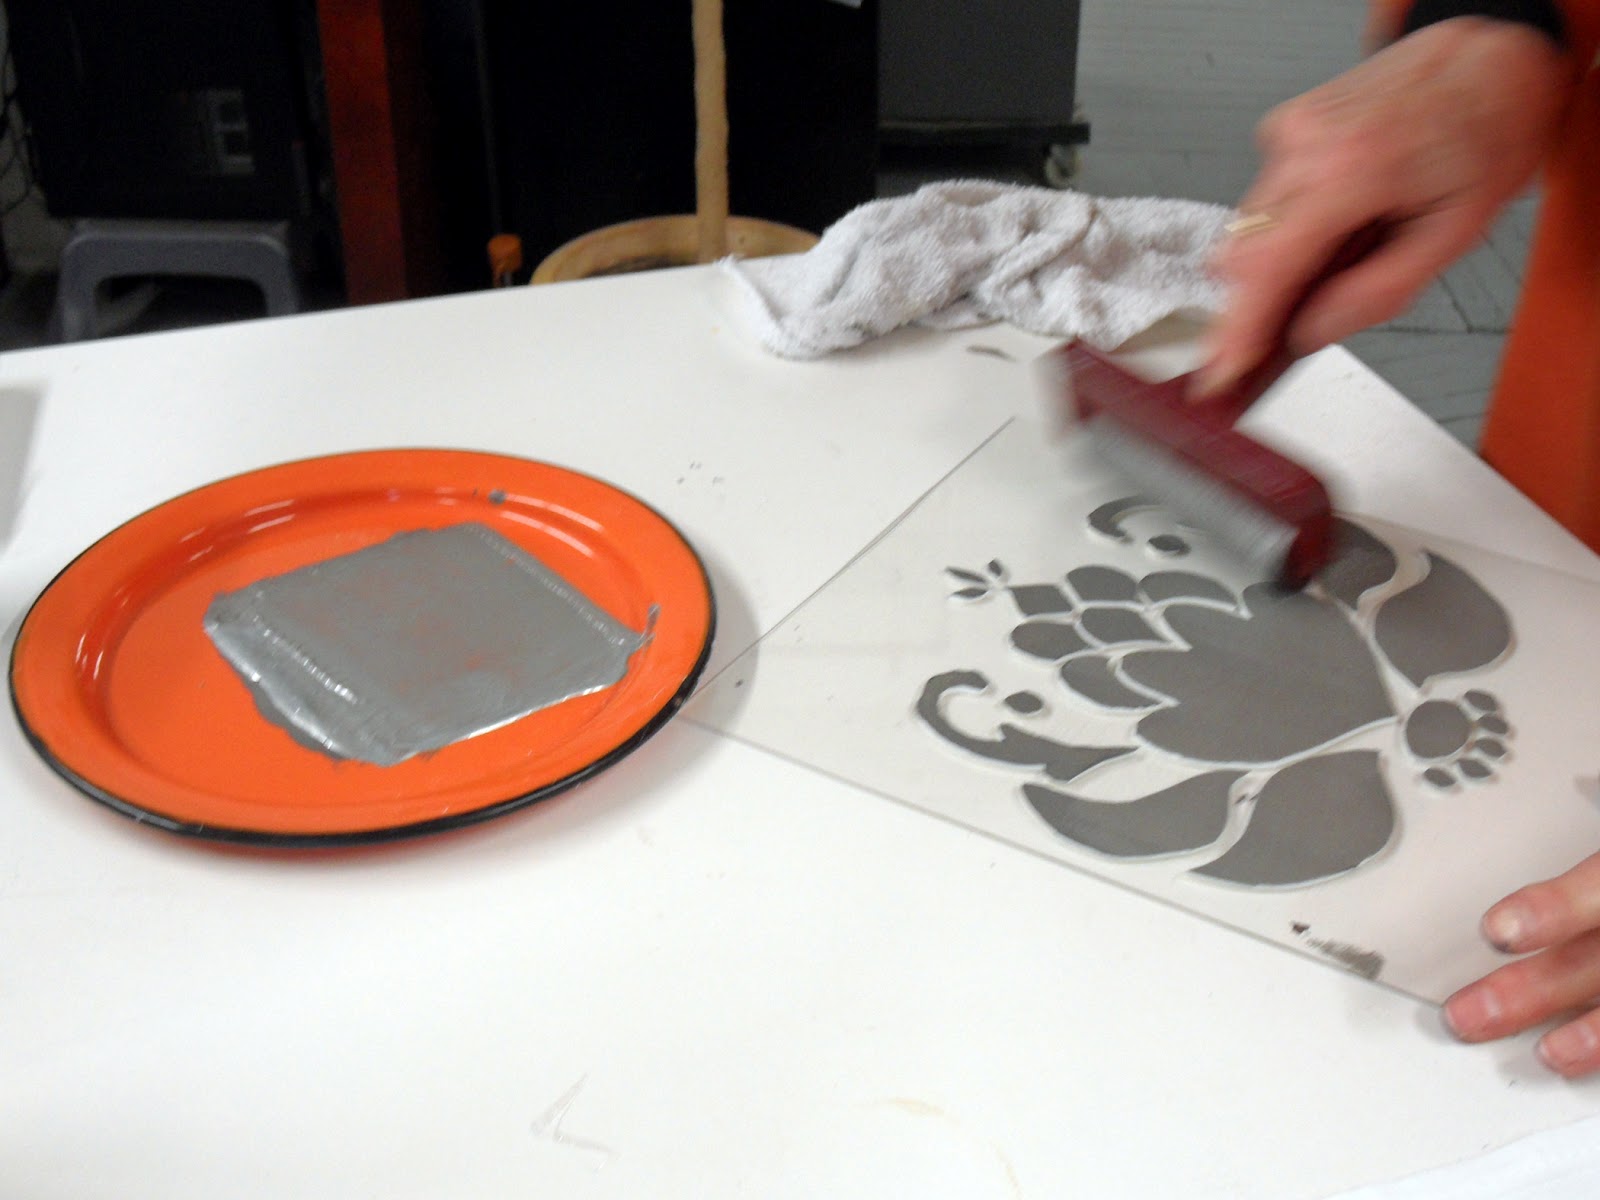
For paint, I used on-hand Martha Stewart multi-surface craft paint in Arrowhead, a dark steel gray. I poured out a thickish line of paint and rolled it out with a foam brayer. The single layer foam stamp was thick enough for a mostly clean application. Once I develop better technique, I'll learn how to avoid paint on the Plexi, which is easily wiped off, but adds labor and invites misprints and waste.

This Plexi is part of the sheet given to me by my neighbor. It probably came from some home store and is 1/32" thick. It has less flex than the thinner Plexi I found at Hobby Lobby and  might be better for large scale blocks - less flex. Or not. I cut it by scoring it a couple of times with a blade, then breaking the cut on the edge of the table.

We had Egyptian cotton four sack towels on hand, so I gave one a quick press and smoothed it on the production table. This soft, thin fabric is not the upholstery weight cotton or linen I envision, but was fine for experimentation. In the end, I'll have a cool towel. Maybe with a fabric binding.

I didn't remember that my rolling pin (which has only seen action once in its entire life) was at the studio, so I used the palms of my hands to press my first block. The drawback to this method is that you don't know you've applied uneven pressure until you lift the stamp. There were a few areas where the paint did not fully transfer, so I realigned the stamp (harder than it sounds) and pressed out those areas. Since this is craft acrylic and not printers ink, my impression had a thin, vintage appearance. Actual fabric ink would result in a bolder, more opaque application.

See the depth of color on the top impression? I got the idea to layer a metallic gray drop shadow over the original print. Fail. I just looks like a misprint. Layering requires more pattern knowledge than I have right now. I'll focus on getting clean, repeatable results then worry about design.

Orange as the color of the day was unplanned, but does photograph well. The plates have been around since day one. The jacket matched my sweater. Driven by some subconscious design force, I chose Martha Stewart's Geranium for my next stamp color. I also switched rollers. I don't know where I found this little foam roller but I'd like to find more. The soft foam absorbed more paint, rolled more smoothly and applied more evenly.
 

When I started this experiment, I was pretty sure that one layer of craft foam was too shallow to create a good stamp. Unless the results on thicker home decor fabrics proves me wrong, one layer works. I'm liking craft foam. It's inexpensive,  readily available, cuts easily, makes a decent stamp and damaged sections can easily be replaced.

Now that I know I can use it, I can get creative with how. I recently found out that craft foam, which includes flip flops, garden keeling pads and plumbers foam insulation, can also be heat embossed. Heated foam will take the impression of anything pressed against into it. Buttons. Crumpled paper. Rubber bands. Coins. Vintage printing blocks. This opens up a world of design possibilities.

Tuesday, May 1, 2012

Stamp Construction

I just spent the last hour laying out, cutting and mounting my first block.  I Photoshopped an image I found online, turning it into this simple black and white. One copy was taped beneath a sheet of  Plexiglas and set aside. The second was placed over a sheet of carbon paper and the foam side of a full sheet of adhesive back craft foam. Then I traced the whole thing with ball point pen.

 The carbon transfer was too light to photograph but dark enough to see, so I retraced the lines with ball point and cut away the extra foam. My cutting mat was the May 2012 issue of Money Magazine. I don't know why I get this publication. I don't have money and rarely sit still long enough to read a magazine. Either way, it was small enough to fit on my desk and spin, which turned out to be useful.

Using an Exacto knife with a newish blade, I cut along the lines and through the paper back. My first cut, the little curly on the top right was awkward and yielded a seriously back-beveled stamp. You can see it in the 4th image. Stamps with inward beveled edges are weak and won't leave a strong impression. Holding and spinning the foam with the blade pressed into the magazine gave me cleaner cuts and made it easier to follow the curves. However, my edges were still beveled.

On the fourth cut, I angled the blade toward the image and ended up with a really nice edge with a slight outward bevel. Now the pressure placed on the plexi back will transfer to all surfaces of the front of the stamp, resulting in a clean impression.

I peeled off the paper back and placed each section on the Plexiglas pattern. This is so cool - I'm making my first print block. I showed The Women in the studio and they said "Really? How come we didn't think of this!" We've had several such epiphanies in the last years.

Here's the mounted stamp. I wasn't particular about the details, this is a rough prototype good enough to test the concept. I'll need to re-carve all of the sections marked with an x. The cool thing about craft foam material is that when you screw up a section, you just cut another one. First print sample, coming soon.

Monday, April 30, 2012

Stamp Materials

At Museware Pottery, we make our own stamps. The process we use to transfer images to our pottery is very similar to block printing. The big difference is that each stamp is painted & handled individually.

Our first attempts at stamp production involved sending our black and white images out to stamp making houses and having them made into stamps. Wicked expensive, done by mail and slooow. Then I found Speedball Speedy Cut carving rubber. We used it to create this logo for the Mount Washington Hotel.

Speedy Cut carves like butter (you can pick it off with your fingernail) creates a wonderful impression and cleans up well. It even holds up to soaking. Image transfer is easy. Place an image from an ink-jet (laser won't work) print side down on the rubber. Squirt the paper with nail polish remover. Rub with a spoon. A reverse of your image transfers perfectly. It is somewhat fragile and shows signs of wear with long term use. We've remade many of our earliest stamps but still have many well preserved older stamps. Our very oldest have dried and yellowed, but still work.


One day I placed an order with Speedball and mistakenly ordered pink Speedy Carve rubber. We heart this rubber. It has all of the characteristics of Speedy Cut, but is not as fragile - you cannot kill this stuff. 

In 2009, I found myself an agent and entered the world of licensing design. A major giftware & home goods manufacturer wanted to license some of my best selling designs. Naive to the process, I thought I had to physically make each design they'd requested. Since the design request included new work not present in the Museware Pottery line, I had to figure out how to get the more complex designs in my head onto pottery. I purchased wicked expensive polymer stamp making equipment. Like thousands of dollars expensive. After spending money I did not have on equipment I did not need, I found out that all they really needed were digital files.

I knew nothing about digital design & didn't even know what jpeg or dpi meant. Got a scanner, brought images of our hand carved designs (painted on tile) into Microsoft Publisher - the only design program I'd ever used.  It was like fricken magic! There was my hand painted work, in my computer! I still remember the day I created my first digital design featuring my own hand painted elements. I have made fire! I taught myself Photoshop and started sending manufacturers jpeg images at 300 dpi. The machine gathered dust. We learned to use it a year later. It's an integral part of our business now.

Long story short, when I saw this Galbraith & Paul image, I knew exactly what I was looking at. I just have to figure out what material they're carving/cutting. I doubt it's rubber - that would be too heavy for blocks this scale. This much 1/4" rubber would weigh ton, making it hard to place with precision. Time to research.

Jenny Nelson of HomeSweet uses adhesive backed craft foam sheets to create her bold and graphic block print designs. One of her printing blocks contains hundreds of tiny tear shaped elements. Each was hand cut out of what looks like two sheets of craft foam. Cool. We know craft foam.

To get the feel for this material, I drew a simple design on the paper back of a single layer of black foam. I tried the lower left cuts using my smallest, sharpest scissors. I ended up with ragged edges and chopped curves. So I ditched the scissors and picked up an Exacto with a shiny new blade. The cuts were easy and resulted in clean lines.

Cutting a double thickness of blue foam with the Exacto was more than twice as hard, but could be mastered with practice. My first cuts were slightly beveled. A straight edged stamp gives a better impression and lasts longer. Some rough edges needed clean up.

I'm not convinced craft foam will yield the thin branches and delicate leaves of the Galbraith & Paul block, but think it could be perfect for larger, simpler elements.

Because block creation is so labor intensive, I have to wonder if G&P might be using a more "permanent" stamp material like unmounted lino block. I found this Golden-Cut Linoleum at Dick Blick. According to reviews, it cuts easier than the grey unmounted linoleum and holds up well after repeated use. It does curl when wet, but not when attached to Plexi. I'll look for something local, now that I know such a thing exists. Something tells me it's going to be a while before I produce any fabric.