
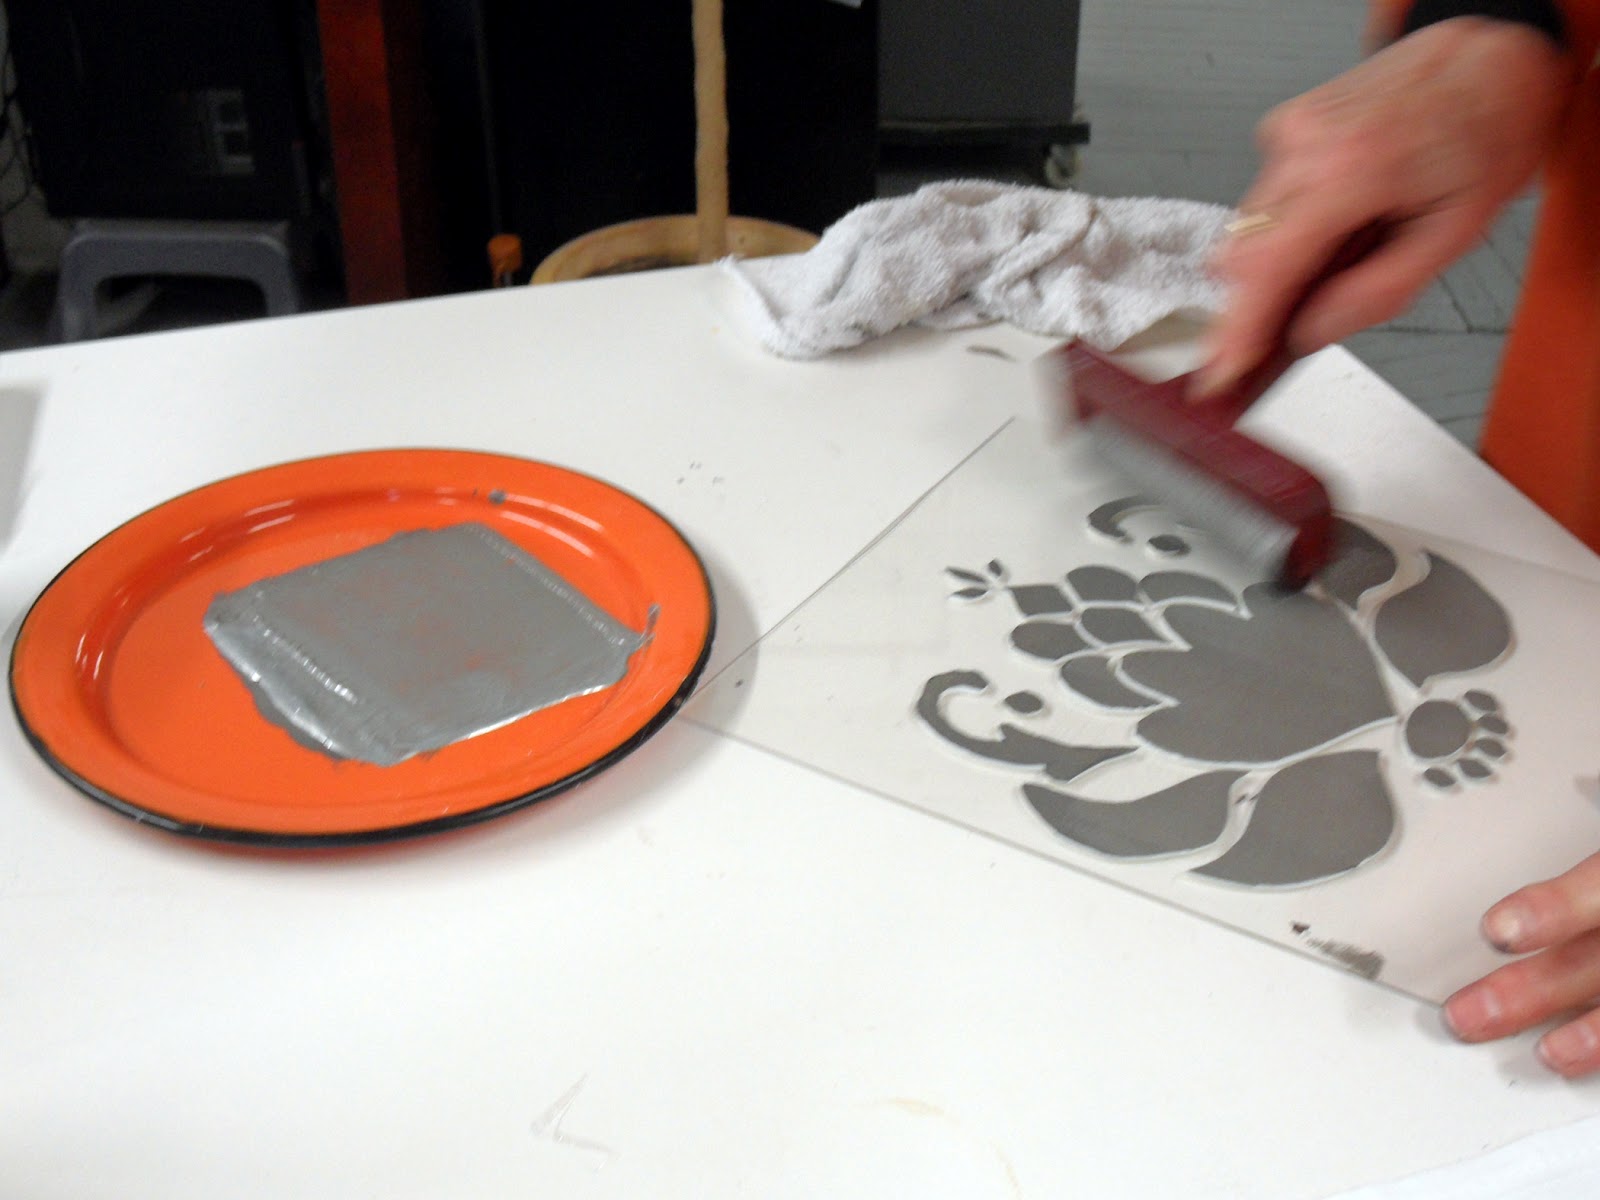
For paint, I used on-hand Martha Stewart multi-surface craft paint in Arrowhead, a dark steel gray. I poured out a thickish line of paint and rolled it out with a foam brayer. The single layer foam stamp was thick enough for a mostly clean application. Once I develop better technique, I'll learn how to avoid paint on the Plexi, which is easily wiped off, but adds labor and invites misprints and waste.
 This Plexi is part of the sheet given to me by my neighbor.
It probably came from some home store and is 1/32" thick. It has less flex
than the thinner Plexi I found at Hobby Lobby and might be better for large
scale blocks - less flex. Or not. I cut it by scoring it a couple of times with a blade, then breaking the cut on the edge of the table.
This Plexi is part of the sheet given to me by my neighbor.
It probably came from some home store and is 1/32" thick. It has less flex
than the thinner Plexi I found at Hobby Lobby and might be better for large
scale blocks - less flex. Or not. I cut it by scoring it a couple of times with a blade, then breaking the cut on the edge of the table.We had Egyptian cotton four sack towels on hand, so I gave one a quick press and smoothed it on the production table. This soft, thin fabric is not the upholstery weight cotton or linen I envision, but was fine for experimentation. In the end, I'll have a cool towel. Maybe with a fabric binding.
I didn't remember that my rolling pin (which has only seen action once in its entire life) was at the studio, so I used the palms of my hands to press my first block. The drawback to this method is that you don't know you've applied uneven pressure until you lift the stamp. There were a few areas where the paint did not fully transfer, so I realigned the stamp (harder than it sounds) and pressed out those areas. Since this is craft acrylic and not printers ink, my impression had a thin, vintage appearance. Actual fabric ink would result in a bolder, more opaque application.
 See
the depth of color on the top impression? I got the idea to layer a metallic
gray drop shadow over the original print. Fail. I just looks like a misprint.
Layering requires more pattern knowledge than I have right now. I'll focus on
getting clean, repeatable results then worry about design.
See
the depth of color on the top impression? I got the idea to layer a metallic
gray drop shadow over the original print. Fail. I just looks like a misprint.
Layering requires more pattern knowledge than I have right now. I'll focus on
getting clean, repeatable results then worry about design. Orange as the color of the day was unplanned, but does photograph well. The plates have been around since day one. The jacket matched my sweater. Driven by some subconscious design force, I chose Martha Stewart's Geranium for my next stamp color. I also switched rollers. I don't know where I found this little foam roller but I'd like to find more. The soft foam absorbed more paint, rolled more smoothly and applied more evenly.

When I started this experiment, I was pretty sure that one layer of craft foam was too shallow to create a good stamp. Unless the results on thicker home decor fabrics proves me wrong, one layer works. I'm liking craft foam. It's inexpensive, readily available, cuts easily, makes a decent stamp and damaged sections can easily be replaced.
 Now that I know I can use it, I can get creative with how. I recently found out that craft foam, which includes flip flops, garden keeling pads and plumbers foam insulation, can also be heat embossed. Heated foam will take the impression of anything pressed against into it. Buttons. Crumpled paper. Rubber bands. Coins. Vintage printing blocks. This opens up a world of design possibilities.
Hi! i have just started printing usin foam, too - normally I use lino but it's amazing how versatile (and apparently under-used!) foam is! I'll look forward to seeing how you get on - it looks great so far!
ReplyDeleteHello Celine - sorry so slow on the response! We played with lino, but it was so expensive compared to craft foam and image transfer was not as simple. Craft foam is cheap and available just about everywhere. We like!
ReplyDeletethis print is very amazing.
ReplyDelete